


A well-maintained fence will last for years and adds a beautiful design element to a home’s exterior. While some people like the appearance of cedar as it ages naturally (and turns a grayish silver color) most prefer the appearance of a painted or stained fence. Painting a fence isn’t difficult. It is time-consuming and repetitive, though. And, proper paint job will not only make give your fence a facelift, it will give it a longer life by protecting it from the elements.
The great news is it is easy to do and just takes some time and preparation. So let’s get going!
Skill level: Novice
Step 1 – Gather Your Materials
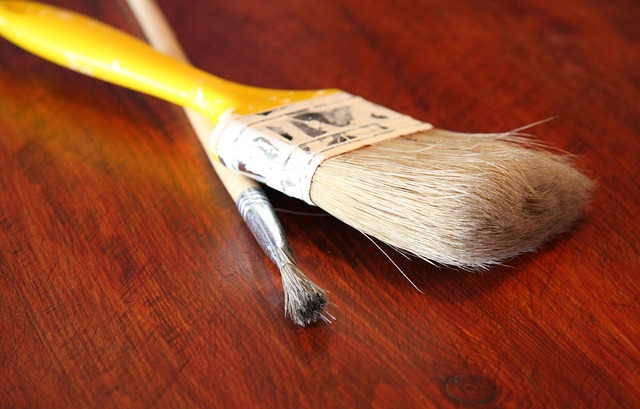
Use good quality paint and primer formulated for outside use. It should contain UV inhibitors and be designed to stand up to the elements. Paintbrushes may seem like they’re all alike, but they really aren’t. Cheap paintbrushes will lose their bristles, will quite likely have rough edges that cause blisters and some are even badly out of balance and will be tiring to use. Spending a few extra dollars is well worth it to get the best out of your tools and produce the finest paint job.

SUMMARY OF WHAT YOU WILL NEED:
- Cloth
- Work gloves
- Rubber gloves
- Warm water
- Scraper
- Sandpaper
- Basic tools for fence repair, such as a hammer and nails or a screwdriver and screws
- Good quality outdoor primer
- Good quality outdoor paint
- Good quality 4-inch paint brush
- Good quality 1-inch brush (or angled/cutting brush)
- Cardboard
Step 2 – Paint the Fence Before You Put It Up
The time to start painting your fence is before it even goes up. Paint the boards, stringers and even the fence posts before you build the fence. It’s a lot easier to paint fence boards lying in your garage than fence boards nailed up in your fence. Plus, this way you can easily cover all four sides. Don’t forget to paint or stain the ends of the boards as well. This is open end grain that will be exposed directly to the elements. If left unpainted, moisture will very easily work its way down into the boards, rotting them as it goes.
Step 3 – Prep the Fence
If the fence is already standing, before you actually start painting, take some time to clean it up. There are probably cobwebs, seeds and who knows what else in the corners where the spreaders meet the posts. Clean these areas out with a whiskbroom and cloths. Get rid of any bird droppings on the fence (particularly on the top of the fence boards). Rubber gloves, a cloth and a bucket of warm water will wash them away. If any paint is flaking or loose, use a scraper or a wire brush to get rid of it. Sand the fence down to remove any burs or splinters and to create the best surface to receive the paint. Check for any insect damage while you’re cleaning up. If you see any signs of termites, have an exterminator come in or you could just replace the boards that are damaged. Finally, make sure the boards are firmly attached – if any are loose reattach them.
Step 4 – Prime the Fence
Bare wood, particularly outside, should be primed before it is painted. It both protects the wood and provides a better surface for the paint to stick to. Applying the primer is the same as applying the paint. Just let it dry completely before you move on.
Step 5 – Paint the Fence
You obviously don’t need to be as careful when painting your fence as when doing your dining room, but its helps to follow a pattern or a process. Work on the fence a section at a time. Start by painting the tops of the boards (the open grain) and then work down the front of each individual fence board and one edge. Slide a thin piece of cardboard under the bottom end of the boards so you can paint right down to the ground and not worry about your brush getting into the grass or dirt. Paint each section in two steps. First paint one side and one edge of each fence board in the section (you may need to use a small brush to get into the edges depending on your fence design). Move onto the next section and follow the same process. By following this process, when you’re reaching in to paint the edges, you won’t get wet paint all over your hands from the board you just painted.
TIP: It works better to paint about 5 boards on one side, and have a second partner, or walk to the other side, to paint that side of the same boards. When painting one side and the center, paint gets on the face of the other side, and if you wait until you are all done with one side, there will be dried lines or mounds of paint on the unpainted side, which you will have to scrape off. So, paint both sides at the same time.
Don’t work in the direct sun or during the heat of the day. Direct sun will make the paint dry too fast and it won’t be able to provide proper protection. A small roller (3-inch) is an option for painting the face of the fence boards. Some people find it’s easier on their wrists and shoulders than a brush. If you have tall shrubs growing close to your fence, slide a large piece of cardboard vertically between the fence and the shrub. Wiggle in between the cardboard and the fence and lean back on the board, pushing the shrub away from the fence so you can get in to paint/stain behind the shrub. The board spreads your weight so no branches will break. When you slide the board out, the branches will snap right back. Painting a fence is may not be as attractive a job as Tom Sawyer made it out to be. However, a good looking, well maintained fence lasts longer and makes any home look better.
GOOD LUCK !
SOURCE: Doityourself.com